Showing posts with label sewing. Show all posts

Wednesday, April 19, 2017

The Porteur Bag

Back in the day, when I acquired Sweetpea, and Bleriot became just my utility bike, there were a few changes.  I added a kickstand, upgraded the rear rack, and, eventually added a Platrack to my little front rack, for a porteur-style platform.

This called for a proper porteur bag, but it took me a long while to get there.  I'd use bungies and all sorts of bags, none of which looked particularly nice.  Having my bikes look nice is kind of a thing for me.
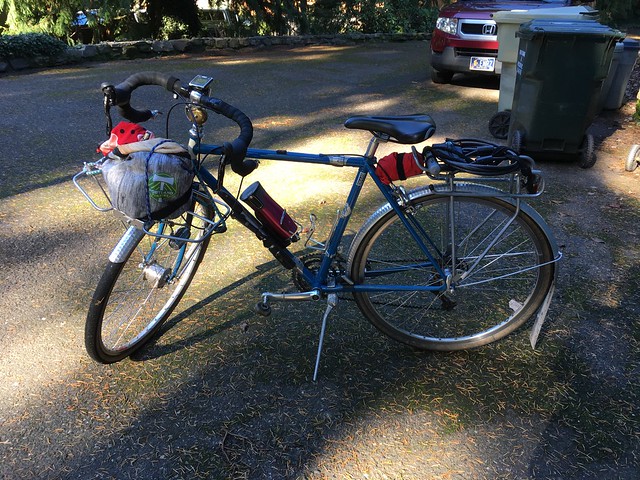
Coffeeneuring, ready to go
(this looks tacky)

Then Lesli gave me some big pieces of waxed canvas.  I could make a bag.  It spent a couple of years being designed in my head, and by then I'd acquired some Pendleton blanket-weight fabric (do NOT ask how much it costs per yard, even at the outlet store.  Just don't.), and my sister-in-law, who runs a halfway house for textiles*, came into some fluorescent green and pink Cordura, which she figured I could find a use for.

I've been collecting bike helmet buckles and straps (WELL WASHED) from helmet giveaways (we confiscated the old one so it would not be used again).  I certainly had the pieces.

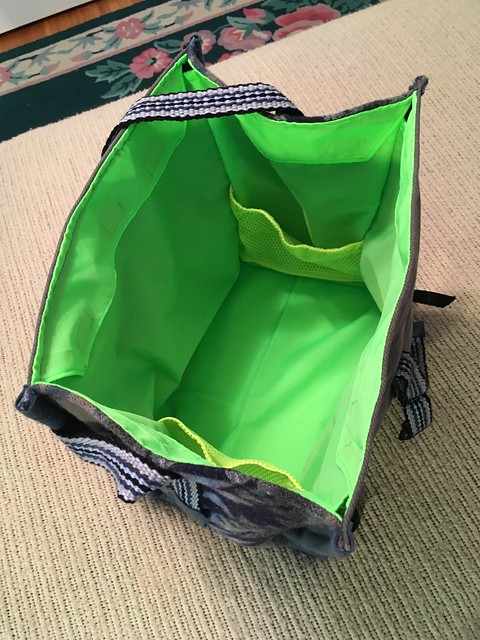
I wanted a fully-lined bag, with some internal pockets for the bits that get lost in the big compartment, and a pocket on the outside for my u-lock and cable, because it takes forever to attach and remove it from my rear rack.  The lining had to be removable (for washing), and the bottom was to be stiffened with a piece of Coroplast (I have a small stash of old lawn signs just for this purpose)

The strap - well, I could BUY webbing, but what with the waxed canvas and Pendleton fabric, it called for an exceptional strap.  I tossed my yarn stash, and wove a strap to match the Pendleton fabric, because I could.
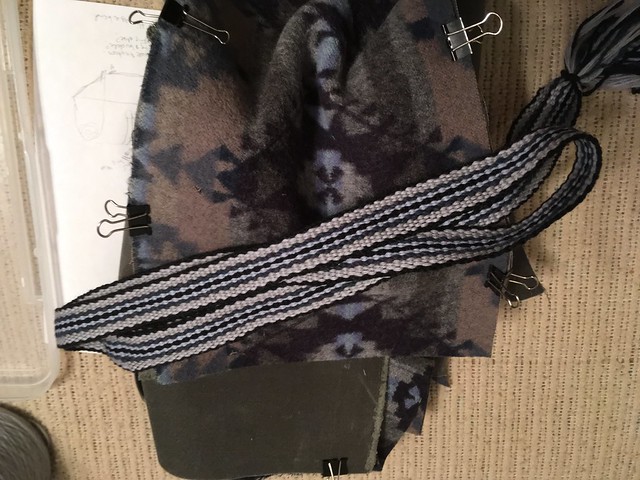
Handwoven band for Porteur bag project

Measured the rack.  Measured the distance between the handlebars - that was a constraining factor.

Made a paper pattern and binder-clipped it together (best sewing accessory since the metal needle, although the Clover Wonder Clips may step ahead in line).

Stared at it awhile.  Looked at other bags on flickr, in particular, David Parsons' bags.

The original design:

Basically, the same size as a reusable grocery bag, but an inch deeper.

Sewing it was fun - my Bernina 930 was certainly up to the task, but arguing with the heavy fabrics did prove a bit of a challenge.

The lock pocket, which was a simple flat pocket, decided it wanted to be a bellows pocket, due to the depth of the lock and cable.

The bag clips to the rack with helmet webbing adjusting clips (Bern and Bell), and running the strp through the tombstone before clipping it; works very well.

The result:
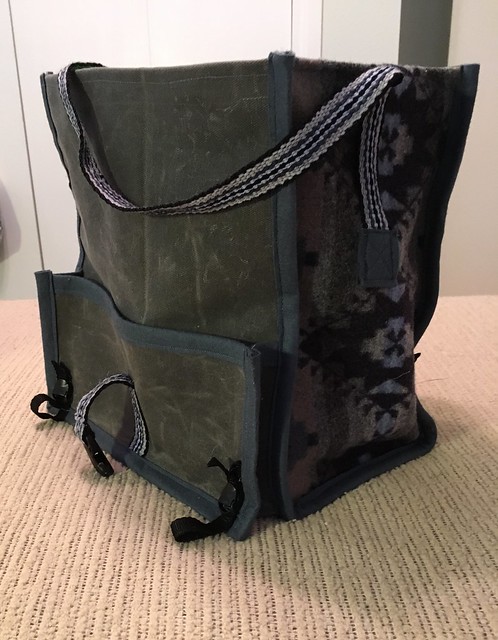
Porteur Bag rear view - the pocket is for my u-lock and cable.

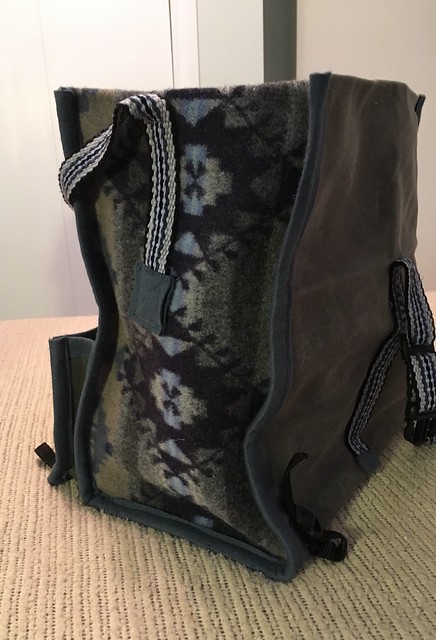
Porteur Bag side view - Pendleton (tm) woolen fabric.

Porteur Bag lining detail - side pockets to corral the little bits

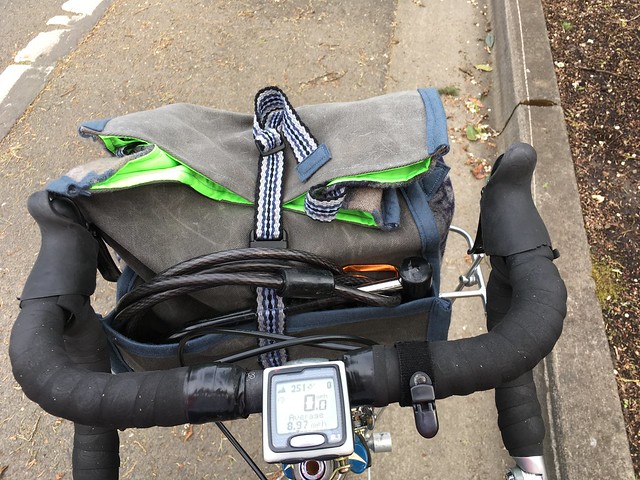
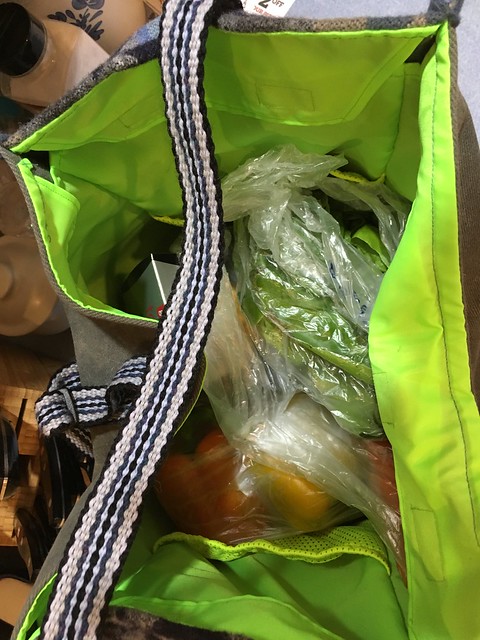
And, in use:

Bag in use; grocery run

Bag in use; grocery run

Notes for next time (hah)
Make it taller for better roll-topping, and use a wider strap.

On the whole, though, I am pretty happy with it.

*textile halfway house - fabrics in interesting quantities show up on her porch.  She redistributes them.  Anything from a bolt of raw silk upholstery fabric (pajamas for me!) to the Cordura, to ribbing, to...

Thursday, June 30, 2016

The Lily Quilt

My nephew and his wife had a daughter, and I was trying to decide on what to give them for a baby present.  I've given up on knitting baby things - they are outgrown too quickly.

On the other hand, a quilt can last a very long time.  I used to make baby quilts - well, I'd make proper pieced quilts in a smaller size :-) - but when nieces and nephews stopped arriving, it fell by the wayside.

The first of those quilts is now 20 years old, the fabric is shredding, and it is still in use.

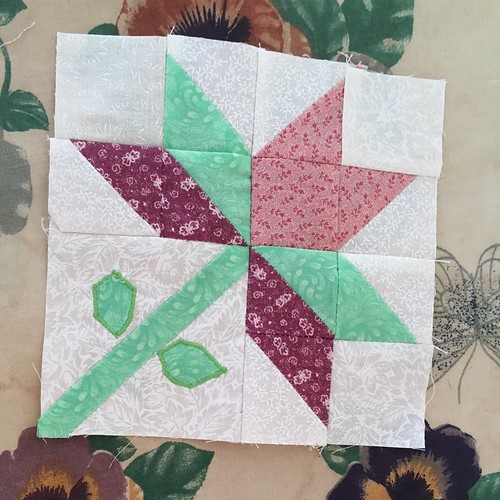
Given that this little girl is named Lily, I started hunting around for a Lily-themed quilt block.  I found this one, and thought it would work out.

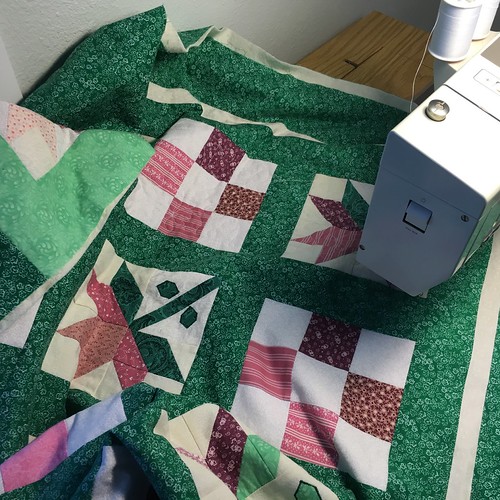
Rummaged through the fabric stash and drew up the pattern.  It had lots of half-square triangles, which are kind of fussy.  The seams have to be perfect for the little points to come out correctly, and it is easy to make a mistake getting all the little bits assembled.

Oops.

I pulled out all my pinks/purples for the flower and the greens for the stem and leaves.  I was trying to not repeat the flower color combination in any block, so eventually I raided another stash for more pinks and purples.  (What?  Buy fabric?  I have too much already!)

The original quilt plan looked like this (yay Visio!):


I was planning to have the blocks go from light flowers in the upper right corner to dark flowers in the lower left corner.  After making up all the blocks, I thought the pink blocks in the sashing and binding might be a little much, so went with solid green.  I did have to buy green fabric for the sashing, borders, and backing.

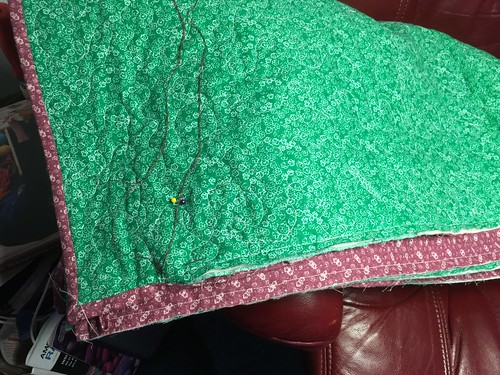
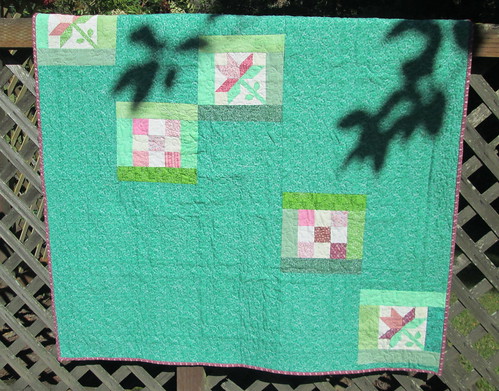
There was not quite enough green for the back, so I pieced it out with a few more quilt blocks.

Then there was the question of how to quilt it.  The design didn't lend itself to straight diagonals; sewing through the centers of the lily blocks wouldn't go well.

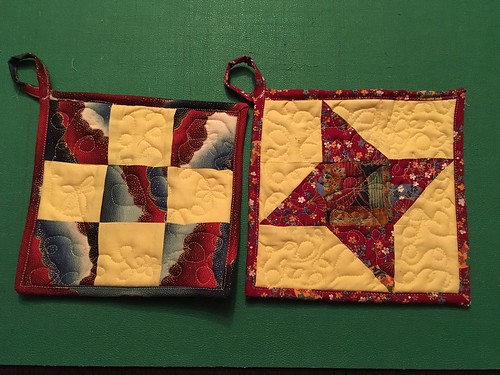
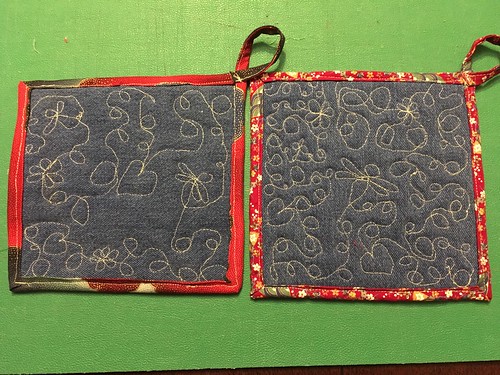
I started researching free-motion machine quilting, bought the 505 Basting Spray and sticky gloves, and took a side trip making a few potholders, which also meant buying some Insul-Bright batting for heat shielding.

Potholders - front view

Potholders - back view

So, after all this procrastination, I spent some quality time on the living room floor getting the backing/batting/quilt top ready for quilting.  That 505 Basting Spray is excellent stuff - no need to pin or baste at all.

Quilting

First I quilted each block, then the sashing strips, then each border.  While it worked out, it did leave a lot of threads to hide afterward. (my sewing table surface has not been this uncluttered in years.)

After that I bound the edges with 200+ inches of binding (one side machine sewn, then the other side finished by hand).

200+ inches of binding to be sewn

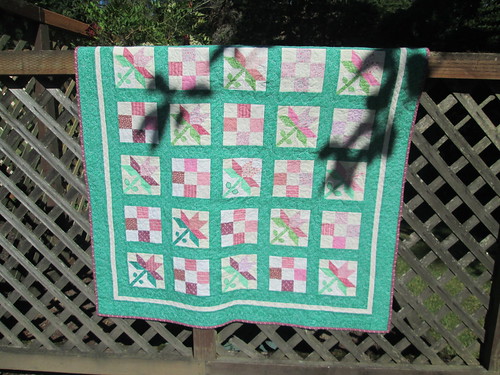
And here it is:

Front of quilt

Back of quilt

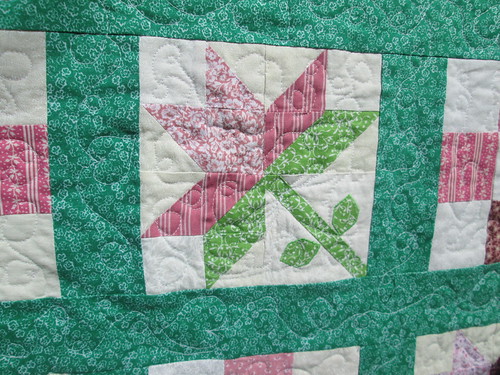
Lily block quilting detail

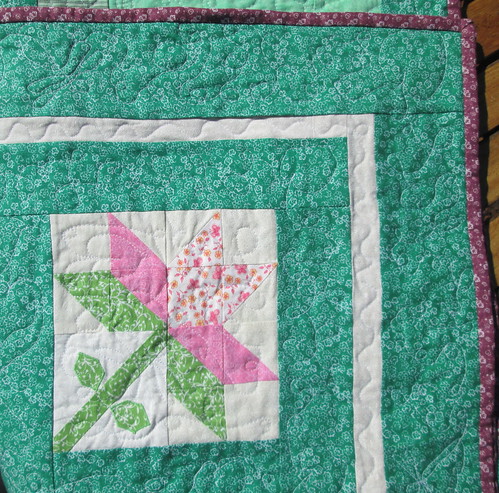
Block and corner quilting detail

(this isn't a surprise; they know it is coming)

Learnings (a project should always have learnings):

  • Half-square triangles.  Probably more practice needed for absolute perfection.
  • Non-skid fabric rulers.  I had purchased one in a useful size I did not have, and then discovered aftermarket non-skid film for my existing quilting rulers.  Discovery: I have many quilting rulers, because I finally collected them into one drawer.
  • Used my aftermarket 1/4" presser foot.  Maybe my needle is off-center a bit.  Maybe I need the Bernina 1/4" presser foot with the fabric guide (#57).  Or I could wing it with my #030, which accepts a fabric guide (which I have).  Oops, presser foot shopping happening.  Also succumbed to the siren call of the button foot (#18) and the upgraded basic foot (#1), which will also accept the fabric guide. In case anyone is wondering, I have a Bernina 930 sewing machine.  Old.  Solid.  Dependable.
  • Free-motion machine quilting.  This is fun.  Purchased the 505 basting adhesive spray, which meant that when I got it all together, the layers of fabric stuck together in a unit, no matter how much I scrunched it all around to quilt.  Also got the sticky fingertip gloves, so as to be able to move the fabric around.  This also lead to...
  • Insul-Brite batting, which I used for the potholders I made for free-motion quilting practice.  I used one layer of the Insul-Brite and one layer of cotton batting.  Next time, maybe I'll up that to two layers of cotton batting.  And make slightly smaller potholders.

Sunday, May 29, 2016

If You Give a Mouse a Cookie. Or a New Rivet Saddle...

The Rivet Imogene test saddle arrived a week ago.  I've been waiting on this saddle for probably a year.  Of course, I had tweaked my back and wasn't doing any wrenching at the moment...

Fast forward to today.  Swapping saddles is expected to be a relatively easy operation.  Put the bike in the stand.  Removed the saddlebag, Carradice Bagman, and spare tire.  Measured from stem to back of saddle, and top of saddle to bottom bracket, so I could reproduce the placement.  Removed the existing saddle.

Rough-installed the new saddle, getting the height and setback as close as possible - the Rivet is taller and a bit shorter than the Selle Italia Diva.  Took the bike off the stand to get the tilt set.

And that is where the "fun" started.  I'd get a tilt setting, crank down the bolt, and ride up the driveway.  No matter how tightly I cranked the bolt, the seat would tip back.  After a few go-arounds with this, I removed the saddle, and dissassembled the seatpost, a Nitto Dynamic 626.  After poking at it a bit, it seemed that the tilt adjustment was frozen.  There was a piece that looked like it should slide, but it wasn't moving.  A little Tri-flow, a big screwdriver and a rubber mallet were called into service, and I gently knocked it loose.  Lots of wiping, regreasing, and reassembly, and I again had a functioning seatpost.

A few more tweaks of the tilt and tightness (and trips up and down the driveway), and I called it good.  Time to reinstall the rear luggage.

Rivet Imogene prototype saddle installed

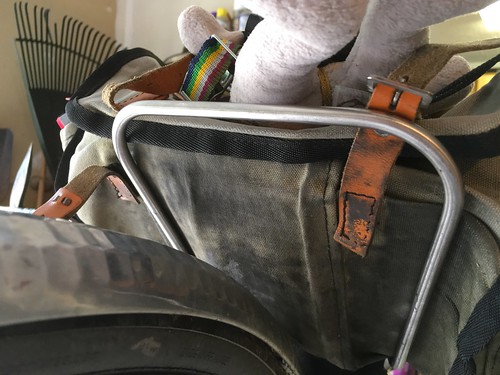
Got the Bagman and Barley back on, and happened to look at the bottom of the Barley bag.  The straps didn't look right, because they were hanging on by a couple of threads (!!!)

the straps are dangling by a few threads

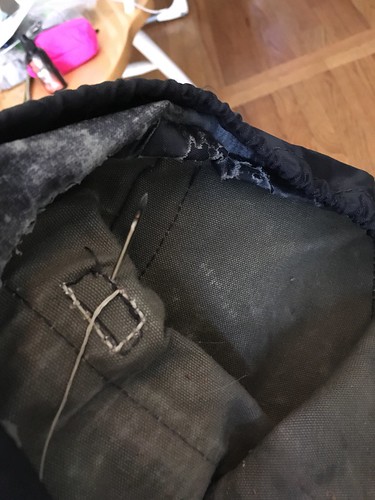
Located the Speedy Stitcher Awl (I've repaired bike luggage before!), and removed the bag.  Emptied the bag (wait, no spare brake cable!  Fetch one from the parts stash!).  Vacuumed it out.

Repairing away with the Speedy Stitcher awl

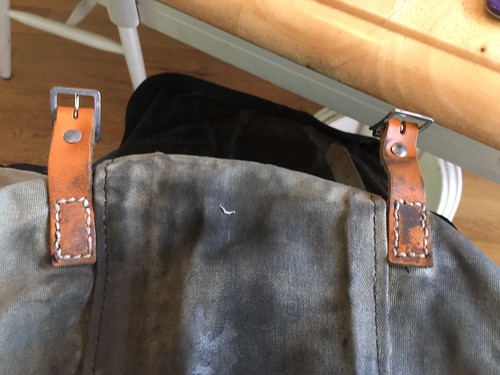
Repaired the straps.

Carradice Barley straps repaired.  Glad I caught it in the garage, and not somewhere far away.

And FINALLY, after all that, reinstalled the bag and spare tire.

Longish ride soon to test it out.